Bilingual Weebly Website Tutorial
Optionally you can download the codes being used in the demo:
For this tutorial we will only be using the 'power' of CSS3 and use the pseudo selector "nth-child" ,
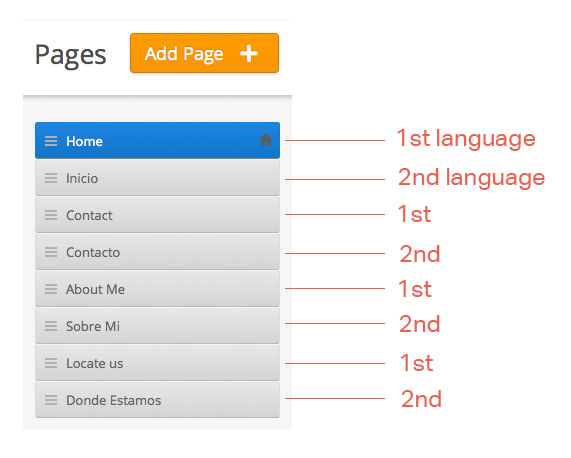
and we will be working with even and odd, therefor all of the pages that will be made will need to alternate each other, that is for the languages.
So each page of the 'first language' has to follow by the page of the 'second language'
In this example there are no subpages, but you can add subpages to any of those main pages and it won't effect the functionality.
Next modification we would have to do is unchecking the: Group excess pages under "More..." option, this can be found back in your SETTINGS tab on top of your page in the editor.
Next modification we would have to do is unchecking the: Group excess pages under "More..." option, this can be found back in your SETTINGS tab on top of your page in the editor.
Now we are all set to start creating our bilingual site!
Creating duplicate page layouts
Why do we have to duplicate page layouts?
Like this we can give a unique class to the body which we can later use in our CSS, and with that class we can give specific properties.
How do we create/duplicate page layouts?
Let's say you first of all created your 'first language' page, now you might be using 1 page layout or more for this site, you can either duplicate all of the layouts, or only the ones that are being used on the site.
We can start by duplicating our homepage layout, we will assume we are using the tall header layout for our homepage.
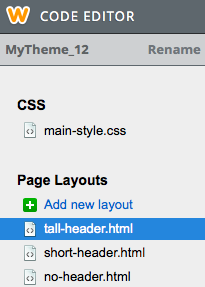
You can see in the image above from our code editor that right under Page Layouts we clicked on tall-header.html (remember it was the layout used for our homepage).
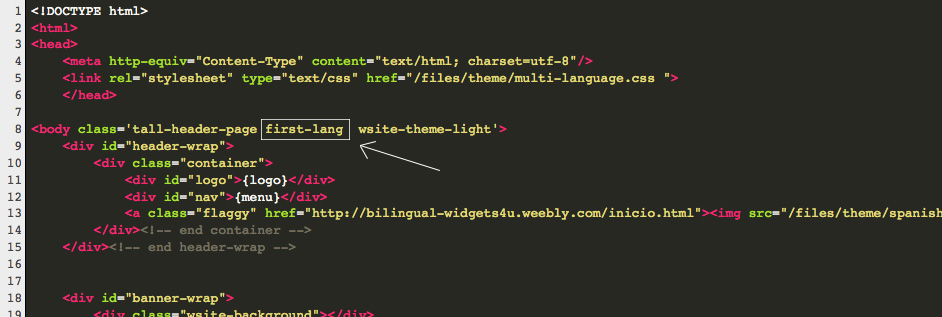
Now on the right you will have the markup of that page layout visible
Part of the markup is visible in the image above, first thing we will do is add an extra class to the body of the tall-header layout (or the layout you are using) and we call it: first-lang (view white arrow on image above)
Now that we have added a new class, we can duplicate the markup, we select everything from this markup and copy it.
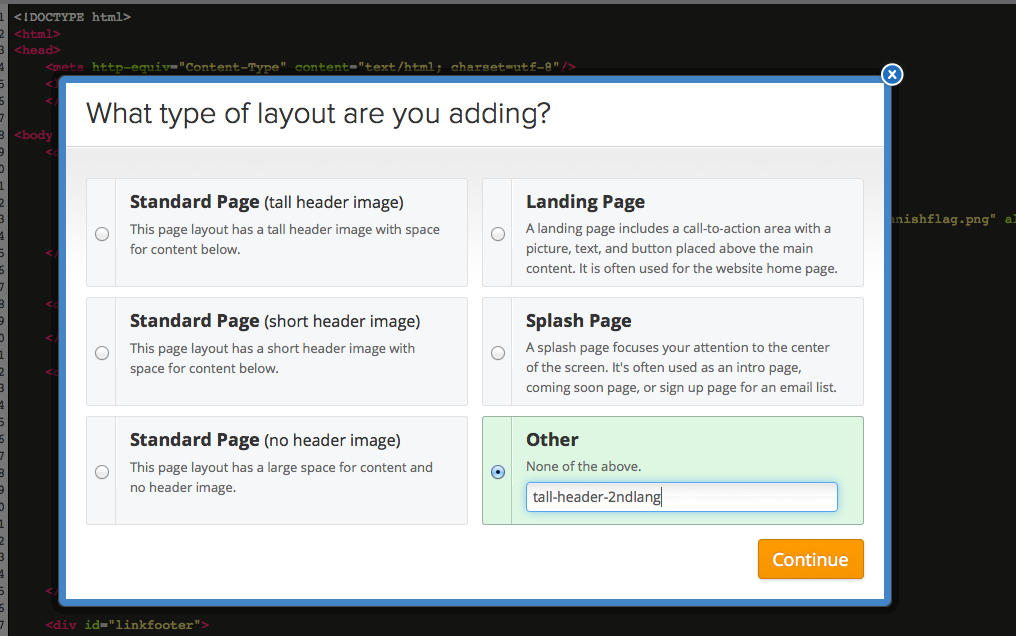
Click under Page Layouts on "Add new layout". A box will pop up where you can choose the type of layout we want to add, we click on 'Other'.
then we can give a specific name for this which will make it easier later to find back in our PAGES tab, when we assign a page to it.
(e.g.: tall-header-2ndlang)
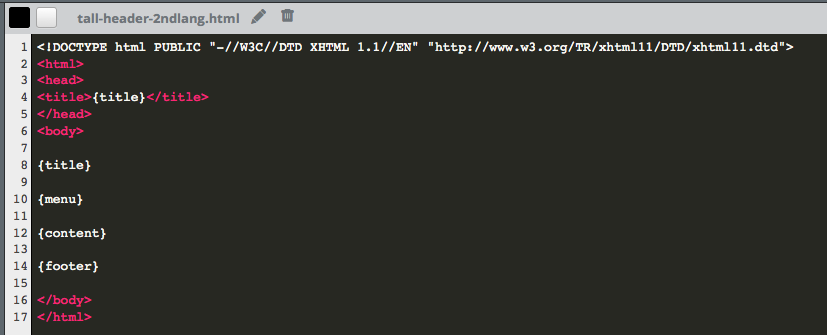
When we click on 'Continue' we will see that an almost empty markup becomes visible:
(e.g.: tall-header-2ndlang)
When we click on 'Continue' we will see that an almost empty markup becomes visible:
We will paste over all of the markup we previously copied from our original tall-header.html and we will make one small modification in the body tag, as you might have guessed we will replace the 'first-lang' class with 'second-lang' (white arrow image below)
Image above shows we changed the class of the body of our duplicated page layout
Now we can SAVE everything from our Code Editor and go back to the drag and drop editor.
Via the PAGES tab in our menu we will now or Add a new Page, or Copy the existing one, the advantage of copying the existing one is that if you have a page with a specific layout and images on it, they will all be preserved and only the text has to be modified to the second language.
Note also that now we have a new Page Layout available in our PAGES tab: (with the name we previously gave to the layout)
- Our second homepage we either copied or added can now have this page layout.
For the remaining pages we will repeat the process and duplicate all of the layouts used on our site, by adding the class: ''first-lang" to the original layout and "second-lang" to the duplicated layout.
Adding the CSS
We will upload the file: bilingual.css to our Weebly files, by clicking in the code editor on Add new file(s):
Then we need to insert the following code to in the head section of the page layouts we will be using: (also available in the downloads, html folder: add_to_head)
<link rel="stylesheet" type="text/css" href="/files/theme/bilingual.css ">
That is all it takes,
only now we would have to link the pages, so visitors can choose which language they want to read. There are many ways to do so, just as shown in the demo. from the page itself to adding an absolute element with a flag image.
The way we have added the little flags in the demo version is as follow:
You can see that exactly after {menu} we inserted the following codes:
<a class="flaggy" href="http://bilingual-widgets4u.weebly.com/"><img src="/files/theme/america-english.JPG" alt="english"/></a>
- between quotes after the href goes the url of the second language homepage
- the name of the image uploaded to our Weebly files
And for the properties of those flags added, we inserted the following CSS in our stylesheet:
a.flaggy{
	position: absolute;
	right: 0;
	margin-top: -50px;
	border-bottom: none;
}

#icontent .flaggy{
	display: none
}
but again, there are a million ways to link to your second language page, up to you to see if your imagination can come up with a nice one.

